In this article we will cover the steps required to create a microservice using Spring Boot, deploy it to the Apache Tomcat server and access the endpoints using a REST client. In the example we will develop a service that exposes a POST operation which will allow registering clients, and a GET operation that will allow us to list the entered clients.
Step 1: Create a microservice using Spring Boot Generating the project with Spring Web starter
We will use Spring Initializr to generate the basic structure of the application including the necessary dependencies.
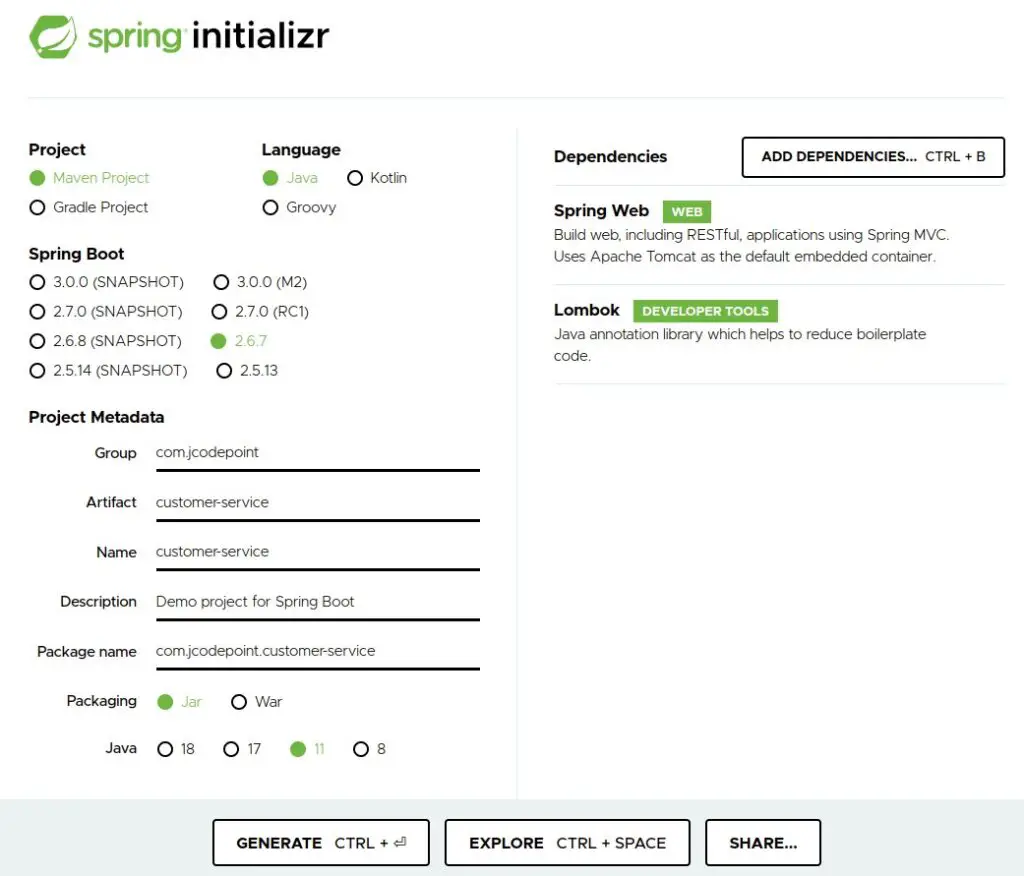
In each section of the page enter the values indicated below:
| Project | Maven Project |
| Language | Java |
| Spring Boot | 2.6.7 (default) |
Project Metadata
| Group | com.jcodepoint |
| Artifact | customer-service |
| Name | customer-service |
| Description | |
| Package name | com.jcodepoint.customer-service |
| Packaging | Jar |
| Java | 11 |
Dependencies
| Spring Web |
Click on GENERATE button. A .zip file will be downloaded with the generated project.
Step 2: Import the project into Eclipse
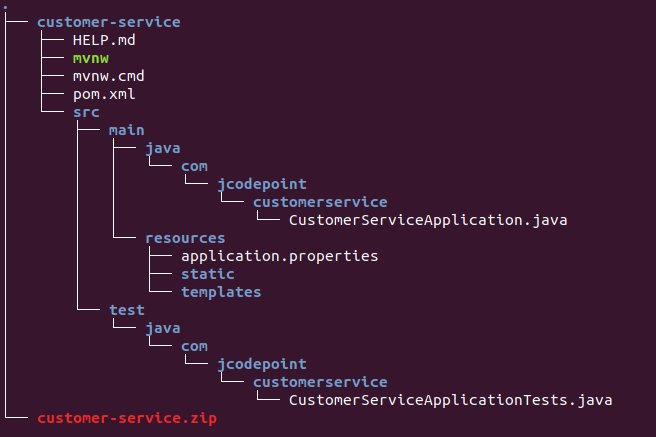
In the downloads folder we would have to find the customer-service.zip file, which contains all the project files. Unzip this file in the workspace folder.
The structure of the generated project is as follows:
Now we need to generate the project files for Eclipse. From a terminal and located in the root directory of the project, execute the following command:
mvn eclipse:eclipse
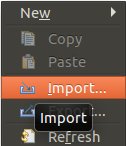
Right click on the Eclipse workspace to display the context menu and select the Import… option.
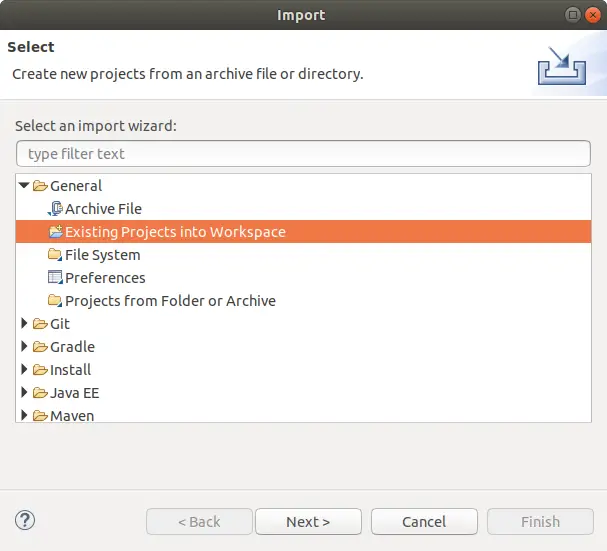
In the dialog that appears, select Existing Projects into Workspace (inside the General folder) and then click Next:
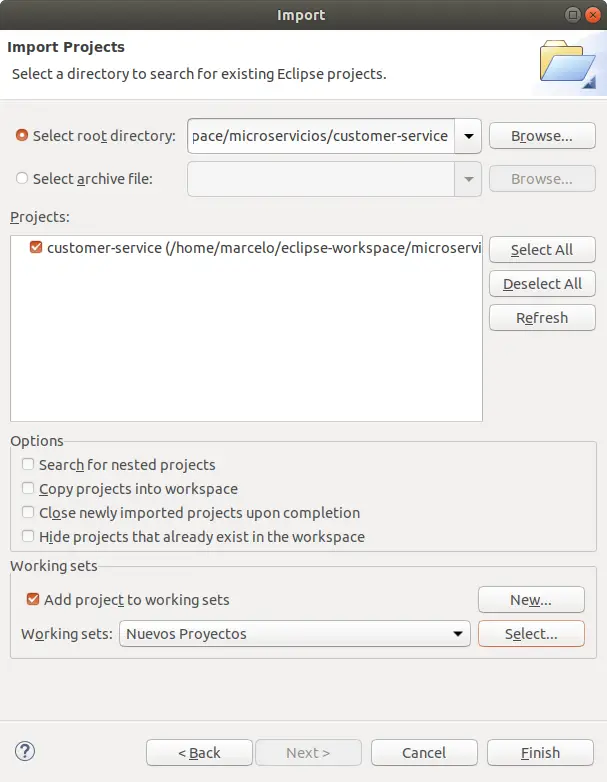
In the next dialog, check the Select root directory option and select the root folder of the project. Optionally, you can also select the Working set for the project:
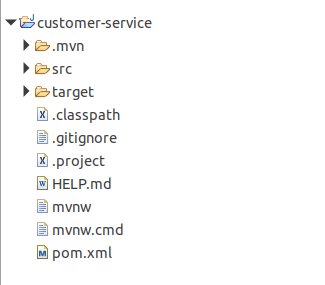
Once the project has been imported, it should look like this in the Eclipse workspace:
Step 3: Implementing the Clients API
Our example will consist of a service with two endpoints for customer registration and listing respectively, for which we will first create the Customer class as a customer entity in our model:
package com.jcodepoint.customerservice;

public class Customer {
	private Integer id;
	private String firstName;
	private String lastName;
	private String location;

	public Integer getId() {
		return id;
	}

	public void setId(Integer id) {
		this.id = id;
	}

	public String getFirstName() {
		return firstName;
	}

	public void setFirstName(String firstName) {
		this.firstName = firstName;
	}

	public String getLastName() {
		return lastName;
	}

	public void setLastName(String lastName) {
		this.lastName = lastName;
	}

	public String getLocation() {
		return location;
	}

	public void setLocation(String location) {
		this.location = location;
	}
}
To finish creating a microservice with Spring Boot, we will create the CustomerController class to implement the RESTful service:
package com.jcodepoint.customerservice;

import java.util.ArrayList;
import java.util.HashMap;
import java.util.List;
import java.util.Map;
import org.springframework.web.bind.annotation.GetMapping;
import org.springframework.web.bind.annotation.PostMapping;
import org.springframework.web.bind.annotation.RequestBody;
import org.springframework.web.bind.annotation.RestController;

@RestController
public class CustomerController {

    private static Map<Integer, Customer> customers = new HashMap<>();

    @PostMapping("/customer")
    public String addCustomer(@RequestBody Customer customer) {
        customers.put(customer.getId(), customer);
        return "";
    }

    @GetMapping("/customer")
    public List<Customer> getCustomers() {
        return new ArrayList<Customer>(customers.values());
    }

}
Note that:
- A HashMap is used to store the entities entered through the POST operation.
- The @RestController annotation marks the class as a RESTful service.
- The class has two methods to implement POST and GET operations, for registration and query, respectively.
Step 4: Run and consume the microservice
For the purposes of this example we are going to deploy the microservice in our development environment and access the endpoints using a REST client.
To launch the application we execute the following Maven command from the terminal:
mvn spring-boot:run
The above command will deploy our application to the embedded Apache Tomcat server.
To access the endpoints we can use any REST client such as Postman, Insomnia, etc.
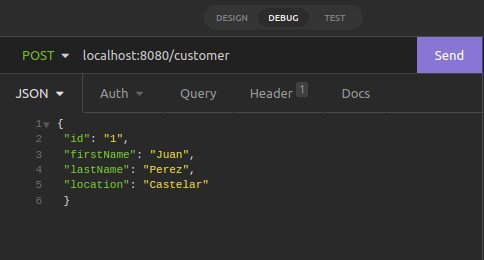
Consume POST service
Below is the access URL and the JSON of the body with the client data to be entered:
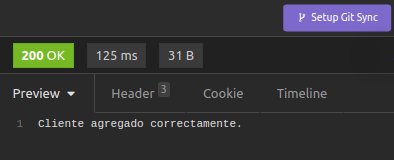
The service response shows status 200 OK, therefore the data was stored in the HashMap:
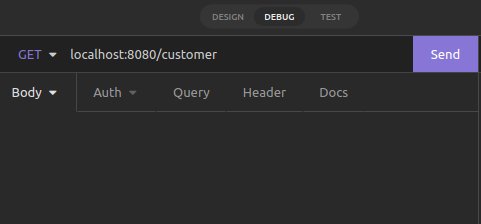
Consume GET service
Below is the access URL for the query operation. We hope that it lists the entities stored in the HashMap:
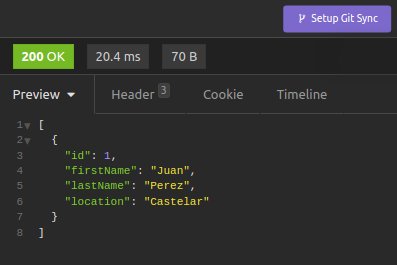
The service response shows status 200 OK and an array with the entity loaded in the previous service call:
Conclusion
In this article we have seen the necessary steps to create and test a REST API. The next step is to document our API for easy access to users. In this article we explain how to document APIs with Swagger.